Forum

> > Projects > Stranded III Dev. Blog
Forums overviewProjects overviewLog in to reply

English Stranded III Dev. Blog

114 replies
Page
To the start Previous 1 2 3 4 5 6 Next To the start

old Sprite Lua API & Interface Screenshots

DC
Admin Off Offline

Quote
Lua API
I started to write the documentation for the Lua API.
> s3sprite Lua API Library

I didn't document much yet - only a few commands of that sprite library - but it's a start. Yes, you see that I'm using a "library"-approach in Straned III. All sprite (2D stuff) related commands will be in the "s3sprite"-library. All object related stuff in "s3o", some core functions in "s3core", you can get things like the screen size with "s3screen" and so on.

Please also note that the new dev page is of course super unfinished and I will work on it to increase the usability and to fix bugs. Please don't report any problems with that page because I'm almost certainly aware of them already.

Some Interface Screenshots
I also worked a bit on the user interface and I drew some icons:
IMG:https://stuff.unrealsoftware.de/s3_menu04.jpg

I'm drawing all icons in a 128x128 pixel resolution - just in case. The actual sizes in-game are currently 16x16 and 32x32.

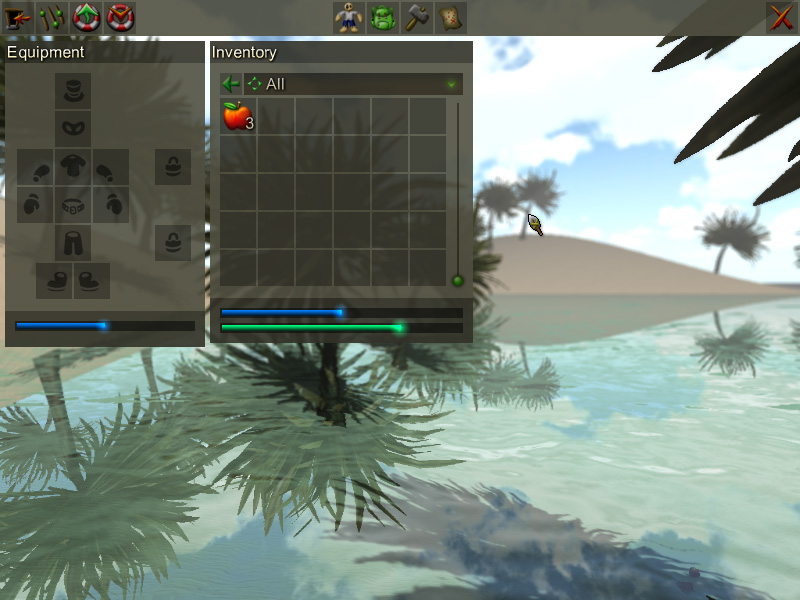
Here's a basic (unfinished) idea for the character / inventory. Nothing special, nothing fancy. It just works like in all the other games so you have no trouble to get used to it. I'm aware that the body slots on the left look like there's a crazy astronaut with a tophat who's planning to go to a masquerade ball...
IMG:https://stuff.unrealsoftware.de/s3_menu05.jpg

The two slots with the locks are additional armor slots for the upper/lower body.

By the way: This is the meaning of the items in the top bar (from left to right):
• Leave
• Settings
• Load
• Save
• Character (stats, skills, ...)
• Inventory (and equipment)
• Crafting
• Map/Diary/Paper Stuff/Research?
• Close

I'll probably add the most important vital stats directly to this bar so you don't have to open the character menu for them. I'm currently considering to show as few interface objects (when no menu is opened) as possible. So you probably won't see your character values (health, hunger, thirst, ...) permanently but only when there's a good reason to show them (like sudden significant changes or critical values). You will probably be able to control this in the settings though. Maybe this will also be somehow restricted by a difficulty level. Like a hardcore mode were you only know that you're hungry because you hear strange sounds from your stomach...

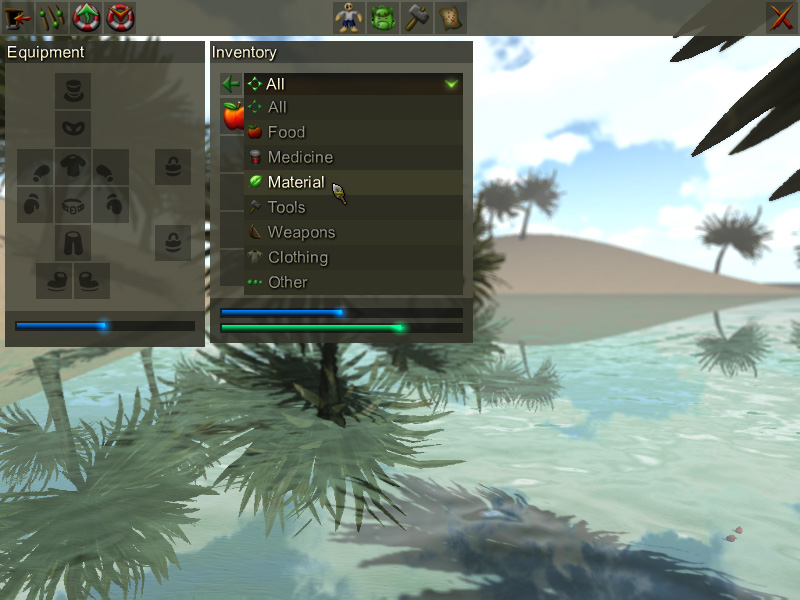
I'm planning to have maaany different items in Stranded III so having categories makes a lot of sense:
IMG:https://stuff.unrealsoftware.de/s3_menu06.jpg


Oh and those bars: weight and capacity (the bars have random values on this shot). I have said something about this idea before I guess. The capacity is limited by the items you use to store your stuff (it's a "hard" limit, you can't exceed it). Each "container"-item has a capacity and an own inventory window. "container"-items have to be equipped. That's why there are shoulder slots. They exist to be able to equip bags/backpacks. The weight is limited by your strength in first instance. Some container-items might get damaged under too heavy weight though. The weight limit is a "soft" limit. You may exceed it but it will have very negative impacts on nearly everything you do (slower movement, less jumping, higher fall damage, faster increase of hunger/thirst, drowning? ...)

Okay. That's it for now!
edited 1×, last 19.06.16 11:59:33 am

old Stranded Deep Is NO Unreal Software Game

DC
Admin Off Offline

Quote
√ Yes, I'm still working on the game!
× No, I have nothing cool to show at the moment.

I recently added a day night cycle. You can specify the light color for each hour with a definition similar to Stranded II. I still have some problems with the skybox though so I won't show videos/screenshots of this yet. I'm also working on a lot of stuff in the code base to get the core code as clean and stable as possible. Unfortunately that's nothing I could write interesting dev blog posts about. So I'll write about something else today:

Stranded Deep has been released 5 days ago on Steam Early Access. It is/was under the top 5 sellers and I tried it as well. For research of course. I have to admit that the graphics look really good but the content is still pretty limited. I think and hope that this game won't become a Stranded III killer as it doesn't support modding or multiplayer. I will keep an eye on it and I'm very interested to see how it goes on and what cool stuff the two guys from Beam Team add.

As inventor and developer of the Stranded series there are three things I dislike about Stranded Deep:

• The name, simply because it has Stranded in it which might lead to confusion

• They added a Wilson reference. To everyone who doesn't know who Wilson is: Watch the (awesome) movie "Cast Away". I added Wilson to Stranded II as well - about 8 years ago...

• They are earning tons of money (it's a topseller on steam which means much) with a game which - at the moment - has significantly less content than my free titles... this makes me a bit thoughtful...

I made this image. Please consider to show it everyone you know who likes / talks about Stranded Deep but never heard anything about Stranded

IMG:https://stuff.unrealsoftware.de/wilson.jpg


Update (31.01.2015):
I want to clarify some things based on the comments here:

• I clearly don't want to take any legal steps! I'm not against Stranded Deep! Everyone should be allowed to develop whatever they like. I fully support this idea of total freedom in game development. Only the result counts: Good games. Taking existing ideas and improving them is crucial and should be supported by everyone. I'm doing exactly this myself a lot.

• I think that Beam Team / Stranded Deep deserves the success. They put a lot of time and effort into the game and they did many things right. The game looks amazing and has huge potential become really awesome.

• My actual point was and still is the following: Please tell people about Stranded. I want people to know that Stranded Deep is not the first/only game of this type (of course Stranded isn't either!).
edited 2×, last 19.06.16 12:00:08 pm

old Some Models

DC
Admin Off Offline

Quote
Some Models
I'm currently trying to get used to Blender which is probably the best but also most complex freeware 3D modelling software. I used Milkshape 3D for all the Stranded I and Stranded II models which is a really tiny and limited tool - at least when being compared to Blender.

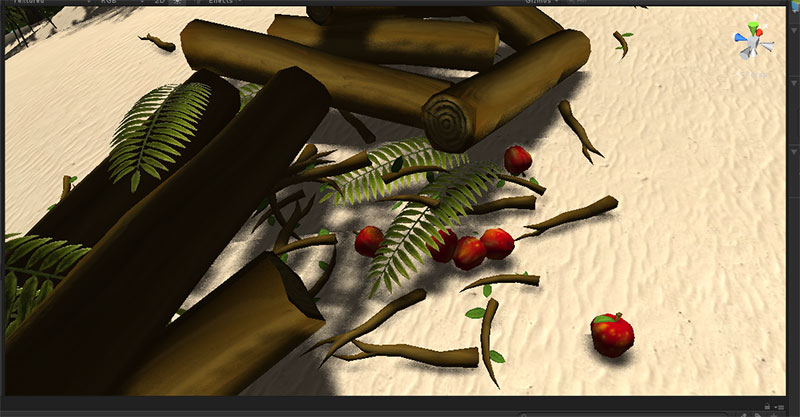
Here are some simple items (screenshot taken in Unity editor):
IMG:https://stuff.unrealsoftware.de/s3_models01.jpg

The apples and the palm fronds (hand drawn textures) are more or less final. The textures for the twigs (little sticks with leaves), sticks and logs are placeholders and still need work.

I also experimented with normalmaps. I used http://cpetry.github.io/NormalMap-Online/ to create normalmaps from a grayscale version of the log texture which led to better results than I expected. The dark tree rings at the ends of the logs are actually mainly caused by shadows casted by the bumpmap (they are much brighter in the diffuse texture).

Moreover I started working on a self-made hammer. Everyone who knows Stranded knows that this is one of the most crucial tools:
IMG:https://stuff.unrealsoftware.de/s3_models02.jpg

I made this in just a few minutes. It has no texture yet and it also needs some kind of rope or whatever so the stone doesn't come loose when using the hammer.
edited 2×, last 19.06.16 12:00:30 pm

old New Job, FPS Display & Handling Terrain Trees

DC
Admin Off Offline

Quote
Oh.. this is funny. You should know that I connected the dev blog with my forum at www.UnrealSoftware.de. I simply did this to be able to use the forum for posting and editing dev blog entries. This way I don't have to write an extra interface for these tasks.

Well.. I just thought about writing a new entry - even though I don't have much to tell and even less to show - and then my (self-written uber awesome) forum software came up with this fancy message:
IMG:https://stuff.unrealsoftware.de/100daysago.jpg


So the last dev blog has been posted exactly 100 days ago (or probably 101 when I'm finished with writing this post). And here's my compulsory sorry for that: Sorry.

I quit my job at 1&1 and moved to Hamburg to work for GoodGame Studios. So maybe this is some sort of excuse. The good part about this change is that I'm now working with Unity3D full time. It's great!

I synced my hobby development environment with my development environment at work: Unity3D, Visual Studio + ReSharper and GIT via Atlassian SourceTree.

My actual progress in Stranded III is quite limited. I'm still busy with doing TONS of refactoring. Yes, I noticed that I'm spending way too much time refactoring but I really want to have a rock solid, stable and clean base engine.

One new thing I added are visual graphs for debugging (FPS and network usage). Nothing special or extraordinarily fancy as you can see here:
IMG:https://stuff.unrealsoftware.de/s3_graphs.jpg


I also decided to go a bit more into detail about the problems I face. Maybe it's interesting for some of you:

Today I spent some time having strong feelings about the incredibly annoying terrain engine from Unity. Using its terrain trees seems to be a very good idea for big maps because they are automatically rendered as billboards when they're far away. This way you get a nice framerate even with thousands of trees. Good.
The ugly part about it: You can't really do much with these trees. You can't use them properly with raycasting (like pointing with the mouse at them and interacting with them) and there is not even a simple and efficient way to remove single trees! What the hell where the Unity guys thinking? EVERYONE wants to destroy trees in games! Static trees are boring!
Wait! It even get's worse: It looks like you can't use assets for terrain trees which you loaded or created dynamically at runtime! This is really bad for modding because it makes it pretty impossible to make trees changeable. Maybe it's possible with so called asset bundles but these can only be created with Unity and they are annoying (+ maybe it only works with Pro - at least it used to be that way before Unity 5).

For the moment I decided to keep real objects for raycasting and collisions which are simply not rendered and to use the terrain trees just for the visualization. It works fine and also removing single trees works with some code. It's probably not the fastest thing to do but it doesn't cause noticeable lags with a few thousand trees so it's okay.

I'm not 100% happy with this solution though. It means that additional memory is used because all trees exist more or less twice. This doesn't seem to be a problem at the moment but... it's still ugly.

I probably have to do more testing and maybe I'll have to write my own terrain engine with own optimizations to get the results I want to see.

Well, thanks for reading!
Here's a totally unrelated and poorly made POTA... - NO! GIF! of (parts) of the lightcycle for your efforts! Fun fact: In the last frame you can see that I currently don't adjust the fog color perfectly at night - it's still too bright!
IMG:https://stuff.unrealsoftware.de/s3_lightcycle_preview.gif

> 800x600 Version (~785kb)
edited 1×, last 19.06.16 12:01:17 pm

old Beware Of The Cloud & Facebook Page

DC
Admin Off Offline

Quote
Beware of the cloud...
I want to reuse the website leaves for the Stranded III main menu. The bad thing is that the part of the leaves which is hidden behind the website content isn't complete because I thought "nobody sees it so I won't draw it" ... so I touched the background image and drew the (still covered) missing parts of the leaves. I also took the opportunity to add some little red berries because why not?

Okay. When I was done I uploaded the stuff to the website, hit refresh in my browser to see it and: Nothing! It was still the same. First I thought: "Ooops... maybe Chrome refuses to refresh its cache. Let's try Internet Explorer!". But it didn't help! Still no berries. I tried to re-upload several times, double checked the paths made sure that I really saved the right files to the right folders. Everything seemed to be okay but did I see the berries? Nope.

I even asked other people to try. No berries for them either. About 5 minutes later I realized: Hey, didn't you enable CloudFlare for Stranded3.com because of those nasty DDoS kids? You did! And bingo: I see berries when I use www.stranded3.unrealsoftware.de which doesn't route over CloudFlare. Try it if you don't see the berries either (don't expect much. They are not that awesome but at least they're red).

Conclusion: CloudFlare can drive you crazy if you forget that you're using it. The berries will appear as soon as CloudFlare updates its cache I guess.

Facebook
I also made a facebook page for Stranded III last saturday. You can like it if you want to stay updated. But maybe I'll add an RSS newsfeed or something like that as well.
https://www.facebook.com/stranded3

Oh and don't forget that there's also the Unreal Software facebook page
https://www.facebook.com/unrealsoftware
edited 2×, last 19.06.16 12:02:02 pm

old Unity + Blender = WAR!

DC
Admin Off Offline

Quote
Unity + Blender = WAR!
Today I tried to optimize my model import workflow. My aim was to get the following:

√ A simple list of steps to get my Blender models into Unity
√ Rotation of [0, 0, 0] in Unity = rotation in Blender
√ Scale of [1, 1, 1] in Unity = scale in Blender
√ Materials and textures should work too

I have read that FBX is the best choice as a format for my Blender models.

Hint: Unity also uses FBX internally when you use *.blend files directly. This is only possible when Blender is installed. Unity then secretly runs Blender in the background and converts the blend files to FBX. You can't see this and you will never see any FBX in your project but this is what actually happens in the background.

So at this point you might think: Why isn't he using the *.blend files directly then? Sounds pretty convenient! No conversion/exporting in Blender required!

Unfortunately it's not that easy.

Problem 1: Axis of evil
Unity and Blender use different coordinate systems because they really love to torture people!
IMG:https://stuff.unrealsoftware.de/coordinates_unity_vs_blender.jpg

There's no fancy x, y, z labeling on the Blender side but here's a secret: The color coding for axis is ALWAYS like this (unless someone screwed something up):
• red = x
• green = y
• blue = z

Luckily it's easy to remember this because colors are commonly saved as RGB (red, green, blue) values in digital systems and this order maps to the alphabetic order of x, y and z!

Ooops. Getting of the point. Well the problem of the different systems is: Objects won't be rotated in Unity like they are rotated in Blender. This is bad but there are multiple ways to fix it:

× Use an empty game object as parent of your model in Unity and then rotate the model inside it but not the parent. Now whenever you want to move/rotate/scale the model you only touch its parent. This hides the messed up rotation but of course it costs additional performance/memory for the empty parent object. It probably doesn't cost much but it's a pretty dirty "fix" nevertheless.
See: http://docs.unity3d.com/Manual/HOWTO-FixZAxisIsUp.html

× Just rotate the model in Blender! Seems like an easy fix but it's not convenient and doesn't feel right either.

√ Export the model with correct axis conversion. That's what I want to do. It means that I can't use *.blend files directly but it seems to be the best approach.

So from that moment on I knew: My list of steps would at least involve the steps in Blender for exporting FBX files. Good to know that there aren't a lot of settings for that...
But hey, the default FBX export rotation setting is the right one already so the rotation is not a problem anymore... at least for the moment...

Problem 2: Materials
I also faced a problem with materials but this probably just happened because I'm such a Blender noob. In Blender it's sufficient to simply load a texture. You can directly UV map it and also see it on your mesh. You don't need to setup a material to make it work. However Unity needs that material for the import because it will make a Unity material from it and it will especially also use the name of that material. It took me a while to find out how that works. Before that I always got strange materials with "No Name" or "None" as name which aren't very descriptive names. By the way: You can also rename the auto-imported materials yourself but a reimport will then create a new material again unless you disable the material import in Unity.

Problem 3: Scale
I wanted the scale [1, 1, 1] in Unity to show my mesh in the original size from Blender. 1 Blender unit (that's the edge length of a blender grid cell) is supposed to be 1 Unity unit and in my scale 1 unit should be 1 real world meter.

Hint: It's really important to get model scales right for various reasons. Physics are one very important point. Physic systems are designed to work best with a specific scale. You will have to do adjustments to certain values to make it work well with other scales. Otherwise your objects are too small/big to collide/react properly and everything will look either too slow or too fast. Of course there are many other problems with wrong scales. For example the limited floating point number precision...

The bad thing about Unity and FBX is that Unity applies a standard scale factor to all FBX files. This scale factor is 0.01. I searched it and someone wrote that this is a fix from Unity for Maya because Maya uses cm as default unit and not m so everything is 100 times bigger when imported and Unity needs to compensate that (I'm not sure if that's really correct but it seems legit). Of course you could also use Maya's export scale factor to fix this but that would be too easy I guess.

So to fix that I have to change the scale factor for EVERY model I import by setting that value in Unity from 0.01 to 1. I found an automated solution for that: Unity's Asset Postprocessor scripts. Someone posted one somewhere. I just refined it a bit to only affect FBX files:
1
2
3
4
5
6
7
8
9
10
11
12
13
14
15
16
17
using UnityEditor;
using UnityEngine;
using System.IO;

public class ModelImportScale : AssetPostprocessor {
    private const float FBXScale = 1f;

    private void OnPreprocessModel() {
        ModelImporter importer = assetImporter as ModelImporter;
        if (importer != null) {
            if (Path.GetExtension(importer.assetPath) == ".fbx") {
                Debug.Log("FBX Import Postprocessor: " + importer.assetPath + ", use globalScale: " + FBXScale);
                importer.globalScale = FBXScale;
            }
        }
    }
}
Additionally I learned (trial & error) that the "Apply Unit" checkbox in Blender's FBX exporter MUST NOT be checked to make the scale thing work properly. At least it seems to be like that.

Problem 4: Scaling and rotation still being weird sometimes
So the stuff above seemed to fix my problems. The models had the right scale and rotation but then after checking the values in Unity I noticed that strange stuff was going on. When I dragged the imported models into my scene I noticed that some had the correct scale of [1, 1, 1] but some others had very strange scale values. The size was correct but the values were unexpected. Same for some rotations.
So I was forced to search for solutions again and I found out that Blender has this "Apply object transformations" stuff. So when you transform the model in object mode in blender it's different to transforming all vertices/faces in edit mode. When you actually want to make something the default rotation/scale you have to apply it first (at least when you rotated/scaled in object mode). This is a very nasty pitfall if you don't know about it.

So I applied the stuff, exported again and the scale was fine! [1, 1, 1] for all models and having the right size at the same time! Awesome. BUT the rotation is now always [-90, 0, 0] in Unity! I want it to be [0, 0, 0] though! This must somehow be related to the different axis I guess but I didn't find the right configuration yet to solve this issue.

Conclusion
Using Unity with Blender is pretty annoying and problematic. I basically wasted a whole day on this and it's still not working correctly.

Next thing I will have a look at is probably this blender Unity import editor script from Edy:
https://github.com/EdyJ/blender-to-unity3d-importer

Edit 13.07.2015:
Today I did some more research. Edy's script is quite complex so I searched for a shorter one and found this:
http://wiki.unity3d.com/index.php/FixBlenderImportRotation
I converted it to C# and added the scale fix. Everything seems to be okay for now! Finally!
edited 4×, last 19.06.16 12:02:24 pm

old Lua: MoonSharp & UI

DC
Admin Off Offline

Quote
MoonSharp
Last weekend I decided to switch from UniLua to MoonSharp for a ton of reasons.

IMG:https://stuff.unrealsoftware.de/s3_unilua_to_moonsharp.png


First of all the code of UniLua was really hard to understand for me because most of the comments (and even some Lua error messages) were just strange Chinese (?) characters. Also UniLua is incomplete and I didn't know how to achieve specific things with it because there is no real documentation either and just very basic examples.

I don't want to use external libraries so I was looking for another Lua alternative which is 100% C# and the most promising candidate I found is MoonSharp.

MoonSharp is very well documented and the code is very clean, structured and easy to understand. I can now do a lot of fancy stuff and it's fun to use. It also seems to be fast enough for my needs. Stranded III is now already fully using it. UniLua has been completely replaced by it.

Sorting Layers
Unity's 2D system offers so called sorting layers to have more control over the rendering order of 2D sprites. This is nice but the the code API for this whole system seems to be very limited. Which is bad because I wanted to expose that functionality to Lua scripters.

The layers are defined in the Unity editor and you can only assign a name and change the order of the layers. They also have an ID internally but you can't even see that ID in the editor. Unfortunately the internal IDs also are not just a simple numbering but they seem to be quite random and there's no API command to get all the sorting layers or their IDs.

No problem though! You can set the sorting layer of a sprite using the integer ID OR the string name. Hooray!

Wait! Strings? That must be slower than using the IDs. And of course it is. I tested it:

I assigned a sorting layer to a sprite 10,000,000 (ten million) times using both methods and measured how long it took.

1
spriteRenderer.sortingLayerName = "Default";
This took 1.9 secs.

1
spriteRenderer.sortingLayerID = 0;
This took 0.25 secs

So using the string method is over 7 times slower. This seems to be a huge difference but it actually doesn't matter at all. The stuff will never be called that often. It would be impossible to notice any difference in performance.

I dislike the idea of working with strings anyway. It seems to be wrong. Especially if you could use faster integer IDs.

I didn't find a good way to get the IDs through code because of missing Unity code APIs (there is a solution for the editor but not for standalone runtime) so I decided to use a little hack to get them: I'm using the string assignment to assign the layer to a sprite and then I use the ID property to get the ID (luckily it's updated as well when the layer is changed). I repeat this for all my defined sorting layers and get a list of all sorting layer IDs this way.

I then simply create a Lua table containing this mapping so that the values can be used easily by scripters. Internally it will use the faster IDs but scripters don't have to deal with them.

UI
I also changed the UI look a bit. It actually looks much more like Stranded II now!

The main menu has leafs now as I mentioned earlier in one of the older blog entries. What you can't see on the screenshot: They are shaking a bit to make them look more natural and alive.
IMG:https://stuff.unrealsoftware.de/s3_2015_07_menu1_pv.jpg


Settings with the Stranded II paper-style background and wooden boards around it:
IMG:https://stuff.unrealsoftware.de/s3_2015_07_menu2_pv.jpg


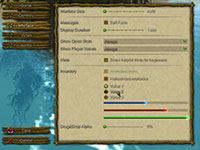
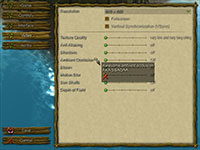
And my self-written Lua UI even supports tooltips with images now. Even though that red cross doesn't make much sense here. Later it might show a sample comparison image with a specific feature enabled and disabled so you can see the difference.
IMG:https://stuff.unrealsoftware.de/s3_2015_07_menu3_pv.jpg


That's it for now. Stay tuned for more!
edited 4×, last 19.06.16 12:02:50 pm

old Fun With Unity Terrain & Caustics

DC
Admin Off Offline

Quote
Having fun with Unity terrain
I had a lot of fun with Unity terrain the last days. Here are my highlights.

Grass
I want to use a lot of grass in the game so I enabled it and made it really dense. The problem: Unity's terrain grass is incredibly slow. It's okay for very tiny terrains but it's slow as hell for larger terrain when you work with a good looking grass density. Unity actually only shows grass which is close to the camera but this doesn't seem to improve the performance much. The mere existence of a lot of grass that is not even visible makes the game run very slow.

Even worse: When having much grass on the terrain it will also affect the performance for adding and removing terrain trees add runtime in a very negative way. Unfortunately this is what I have to do a lot in Stranded III.

So I discarded the idea of having one terrain per island and decided to split everything up into fixed size terrain chunks. That's how most open world games do it anyway. This is awesome because terrains can be even larger with this technique (it allows a nearly unlimited size in theory) but of course it makes the underlying logic a bit more complicated. It solves the problem with the dynamic tree adding/removing-performance because Unity has to update only small chunks every time. I'm currenlty using chunks with a terrain resolution of 128x128.

Anyway: My current conclusion for Unity's grass is that I simply can't use it because it's too slow. I know that there are faster solutions though and I'll try to find the one which works best for me.

Terrain Heights
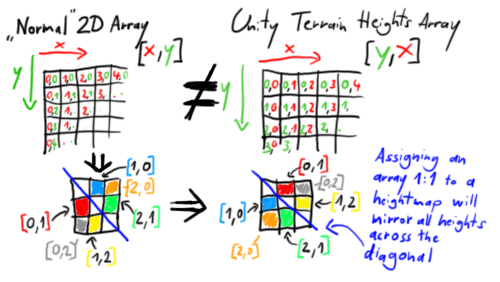
A very important thing to know when working with Unity's terrains in code is that the heights are not saved in the common [x,y] order but in [y,x] order. This is very confusing and makes it super annoying to use (at least in my opinion) but whatever.

Here's a little image visualizing the problem:
IMG:https://stuff.unrealsoftware.de/s3_unity_terrainheights.png


So don't forget to swap X and Y (or Z) at the right places or you'll run into fun problems.


Terrain Neighbors
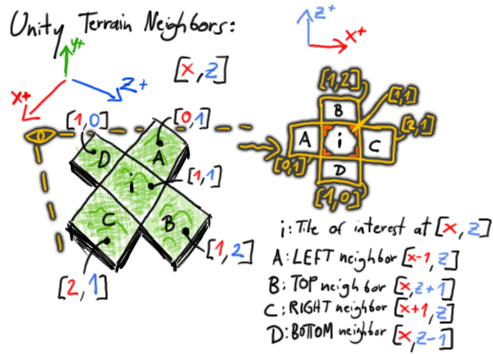
Another thing which took me some tries to get right were terrain neighbors. When using multiple terrains right next to each other you have to mark them as neighbors, otherwise their edges will be very visible. This is a mutual process. So you have to tell terrain A that it has neighbor B on the left and you also have to tell terrain B that it has neighbor A on the right.

For some reason I'm accustomed to a coordinate system where the Y-axis is pointing downwards. Meaning: Increasing Y makes things go lower. In Unity it's the other way round. The Y-axis is pointing upwards. Increasing Y means that things go upwards. The Unity developers were consequent about this when it comes to terrain neighbors only that the Y-axis is replaced by the Z-axis in that case because terrains are positioned along the X- and Z-axis.

The Unity guys don't care much about documenting the terrain stuff properly:
http://docs.unity3d.com/ScriptReference/Terrain.SetNeighbors.html

It's not defined what left, up, right and bottom is so I mixed top and bottom up in my first attempts - but I managed to fix it. Here's an image about the correct neighbors. Maybe it's useful to some people:
IMG:https://stuff.unrealsoftware.de/s3_unity_terrainneighbors.png


Caustics
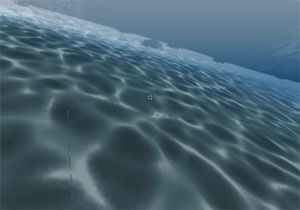
I also did caustics for diving. I'm using a projector for this with a custom tiled projector shader which allows me to cover bigger areas by tiling the animated caustics texture.

Some links related to this:
• Animating a projector texure: http://answers.unity3d.com/questions/39572/using-a-projector-to-place-a-animated-image-on-a-t.html
• Custom shader for tiled caustics: http://answers.unity3d.com/questions/414989/resizing-a-projector-and-tiling-texture.html

I'm still having some problems with the caustics though:
× They don't tile seamlessly. There's a visible edge which is NOT caused by the texture. See image below.
× They are not affected by fog.
× On some models they cause strange artifacts.

I guess that at least the first two problems can be fixed with some shader magic but I'm not very experienced in that topic so I'll probably have to invest some time to get these things right.

IMG:https://stuff.unrealsoftware.de/s3_ugly_caustics.jpg

(don't try to click it for a larger version, I scaled it down because it's ugly )
edited 2×, last 19.06.16 12:03:19 pm

old Random Terrain Generator

DC
Admin Off Offline

Quote
Random Terrain Generator
Generating terrains is one of the main things I took care of the last days/weeks.

I found a pretty cool, big and detailed article about procedural map generation based on Voronoi polygons. This actually doesn't fit to the height maps in Stranded III because their data is based on arrays and not polygons with more or less arbitrary positions. Of course I can use polygons anyway but I have to rasterize them in some way so I can store their data in arrays.

Areas created from random points
So after seeing that article I wanted to go for a comparable approach. The first step is to somehow separate the map into areas which then can be used as a base for further transformations. It seemed to be way too much effort to use all that Voronoi stuff. So I came up with this simplified algorithm:

• Create a 2D array for the map
• Iterate over the array in x and y direction (nested loop) with a certain step size > 1
     • For each step spawn a point at the current position with a random offset (which is smaller than the step size)
     • In some (random) cases spawn an additional point with another small offset in the same area
     • The point(s) created per step will get a an ID
• Iterate over the entire array (nested loop, now over EVERY array cell so the step size is 1)
     • For each cell iterate over all random points and find the closest one to the current position
     • Save the unique ID of the closest point in that array cell

This is very slow because you have to iterate over ALL points for ALL array cells and calculate the distance. In my case I had an array with the size of 512x512. I spawned a point (or 2) every 8 units. So at least (512/8)^2=4096 points and max 4096*2=8192 points.

By the way: The random secondary points are used to get a less uniform result.

In worst case there are 512*512*8192 distance calculations which equals the insane number of 2,147,483,648. I didn't bother to do exact measurements but I think it took over 30 seconds to run this.

Here's my first result after rendering it:
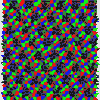
IMG:https://stuff.unrealsoftware.de/pics/s3dev/mapgen/biomegen01_pre.gif

> Click me to enlarge


Ooops. So something went wrong there. But no worries. It was just the rendering (classic stuff like like mixing up x and y):

IMG:https://stuff.unrealsoftware.de/pics/s3dev/mapgen/biomegen02_pre.gif

> Click me to enlarge


Still not exactly what I wanted to display. The third attempt gave me the desired result:
IMG:https://stuff.unrealsoftware.de/pics/s3dev/mapgen/biomegen03_pre.gif

> Click me to enlarge


So this is actually a pretty acceptable result. Sadly the (run-)time required to create it was totally unacceptable.

There would be a ton of ways to optimize my simple algorithm. It's totally stupid to check all points for all array cells for example. It would be way more efficient to store the points in a sorted data structure and to only check the closest points for example.

Back to Voronoi
I didn't try to optimize my poor algorithm. Instead I went back to the Voronoi stuff. There are even multiple C# Unity implementations linked on the article page. I took the first one which is available here, did some basic cleanup and added the demo to Stranded III:

IMG:https://stuff.unrealsoftware.de/pics/s3dev/mapgen/biomegen04_pre.jpg

> Click me to enlarge


I noticed that the demo displayed a lot of stuff that I don't really need so I reduced it to the most important stuff:
IMG:https://stuff.unrealsoftware.de/pics/s3dev/mapgen/biomegen05_pre.jpg

> Click me to enlarge


This is cool and fast - at least compared to my own algorithm. The next step was to somehow rasterize this into my array. I already implemented Bresenham's line agorithm in Stranded III so it wasn't very hard to do this:

IMG:https://stuff.unrealsoftware.de/pics/s3dev/mapgen/biomegen06_pre.jpg

> Click me to enlarge


But what I actually need is the area enclosed by those lines, not the lines themselves. I needed something which allows me to rasterize polygons which are defined by vertices/edges. I knew that this can be done with a scan line algorithm but I didn't really find a good implementation of this for C# so I started to write my own one.

My first visual result with it was this:
IMG:https://stuff.unrealsoftware.de/pics/s3dev/mapgen/biomegen07_pre.gif

> Click me to enlarge


Well... this somehow worked a bit but there's clearly something wrong. I found out that I had - again - a problem in the rendering code. So I fixed that one:
IMG:https://stuff.unrealsoftware.de/pics/s3dev/mapgen/biomegen08_pre.gif

> Click me to enlarge


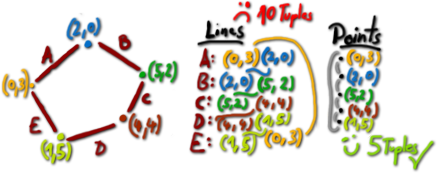
Still not correct. It took me some time to find out that I did a pretty stupid mistake. It's easy and convenient to store edges as lines which consist of a start point and an end point. This however is pure waste of resources when talking about polygons because the end point of one line is always equal to the start point of another line. So when storing polygon edges as lines you would have to store all points twice which is just a horrible idea.
IMG:https://stuff.unrealsoftware.de/pics/s3dev/mapgen/lines_vs_points.png

Instead I wanted to store them as points/vertices which are just connected in order. So I converted the list of lines that the Voronoi stuff spit out to a list of vertices. The lines were not ordered the way I thought they would be which caused the funky problems you can see above. The colored and black areas are defined by invisible edges which span between the wrong edge points.

I fixed the order and this is my current result:
IMG:https://stuff.unrealsoftware.de/pics/s3dev/mapgen/biomegen09_pre.gif

> Click me to enlarge


Yay! This one still has some minor issues but it basically does what I want. The most visible problem is probably the missing/partial fill of polygons on the left and right border. That's because the edges are missing there but it shouldn't be very hard to solve this.

Keep in mind: This is all just about splitting the terrain into areas which can then be used for further operations. The colors are just for debugging. This is work in progress terrain generation.

I'll continue with this topic in my next dev blog.
edited 6×, last 19.06.16 12:03:34 pm

old Terrain Generator Continued

DC
Admin Off Offline

Quote
Terrain Generator Continued
Yes, I continued working on the terrain generator!

Biomes & Shoreline
I fixed the issues with the borders and distributed random biomes. The biomes are defined in simple definition-text files and you have some settings to control how/where/how often they are spawned. The shoreline is currently the most simple one I can use: Everything which is touching the border is sea, everything else is land. That's why it looks like a square. Of course this can and will be refined later by (semi-)randomly making some more areas sea.
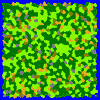
IMG:https://stuff.unrealsoftware.de/pics/s3dev/mapgen/biomegen10_pre.gif

> Click me to enlarge


Heights
Each pixel is one meter, so I decided to increase the sizes of the areas a bit. Also for the height distribution I wanted to give inner areas a higher potential to be high than shore areas which should always be quite low. For this I had to determine the distance to the shore.

Here's a funky rainbow image I used as debug visualization to make sure that my shore-distance-calculation works as intended:
IMG:https://stuff.unrealsoftware.de/pics/s3dev/mapgen/biomegen11_pre.gif

> Click me to enlarge


And here's an actual heightmap (brighter = higher):
IMG:https://stuff.unrealsoftware.de/pics/s3dev/mapgen/biomegen12_pre.gif

> Click me to enlarge


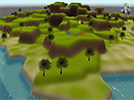
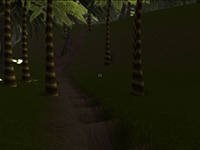
Here's the 3D terrain with some heights (not the ones from the heightmap above) applied. The height differences on this shot are just very small and entirely random.
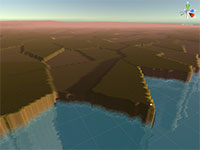
IMG:https://stuff.unrealsoftware.de/pics/s3dev/mapgen/biomegen13_pre.jpg

> Click me to enlarge


So this looks bad, right? My next steps were to apply bigger differences in height and to actually make use of the shore distance height stuff I just talked about. I also applied some smoothing along with some perlin noise to make everything look a bit more natural.

The following screenshot shows the results. The textures are only based on the height (low height = beach, everything else = grass). Later there can be different textures for different biomes.
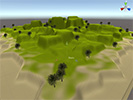
IMG:https://stuff.unrealsoftware.de/pics/s3dev/mapgen/biomegen14_pre.jpg

> Click me to enlarge


I then noticed that grass looks very bad on steep slopes so I decided to incorporate something like a cliff texture which is automatically applied to all tiles were the height difference to adjacent tiles is higher than a defined threshold (>1m in this case). It's blended softly between a height difference of 1m (100% grass) and 2m (100% cliff). I know that similar results could also be achieved with shaders but I wanted to give this simple approach a try first.
IMG:https://stuff.unrealsoftware.de/pics/s3dev/mapgen/biomegen15_pre.jpg

> Click me to enlarge


Also here's a short video in pretty bad quality (sorry!)
> https://www.youtube.com/watch?v=dRjd0CLc0b0
• Fun fact: The huge shadow in the beginning is from a broken import of a dummy player model. It was probably caused by upgrading to Unity 5.2 but I'm not even sure anymore.

All this needs a lot of tweaking now but the results already aren't too bad in my opinion. The advantage of this simplified approach is that you get a lot of plains which is quite useful because they are required for building and they are also more convenient for players in other situations. Of course bigger slopes are missing here. Only smoothing can create (small) slopes at the moment but I'll improve this. I could of course also set the heights of the edges of the Voronoi polygons and then interpolate the heights between based on these edge heights. This would give it a very natural look even without smoothing but it would also completely eliminate all cliffs. So a mixture of both approaches is probably a good way to go.
edited 2×, last 19.06.16 12:03:53 pm

old Models: Axe & Hammer

DC
Admin Off Offline

Quote
Models
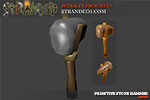
I started modelling a hammer in one of the earlier dev blog entries and many of you didn't really like it. And I agree, it wasn't good and pretty unrealistic. Therefore I made a new one, actually using some reference pictures instead of imagination only.

The texture is not finished but here you go:
IMG:https://stuff.unrealsoftware.de/pics/s3dev/models/primitive_stone_hammer_pre.jpg

> click to enlarge


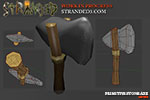
I also made an axe by simply deforming the hammer a bit:
IMG:https://stuff.unrealsoftware.de/pics/s3dev/models/primitive_stone_axe_pre.jpg

> click to enlarge


The renders are from blender and I didn't bother about a cool setup so please ignore the glossiness etc.

Advanced Foliage Shader
I bought the Advanced Foliage Shader on the Unity Asset Store when it was on sale for a few dollars. I guess it's cool but I struggle with a proper setup and the creation of proper models. I recorded the interim results in a short video:
https://youtu.be/5FIMJGhHdLE

Fun.
edited 1×, last 19.06.16 12:04:11 pm

old Rivers

DC
Admin Off Offline

Quote
130 days since the last update and no dev blog entry in 2016 yet? Let's change that!

Rivers
I fine tuned the terrain generation a bit and I'm currently working on random river generation.

My first primitive algorithm to create random rivers worked like this: Rivers start at random points. To calculate their flow direction I simply check all 8 adjacent heightmap heights and choose the one with the lowest altitude as successor. A river ends if there is no adjacent field with a lower/equal altitude than the current one. That's because water can't flow uphill.

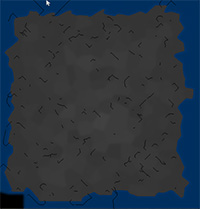
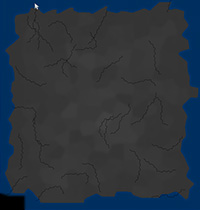
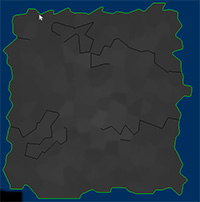
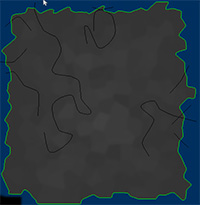
For the following picture - which is basically a heightmap visualization - I set the altitude of rivers to 0 to make them very visible (black lines). Scale: 1 pixel = 1 m² (and yes, the black bottom left field is a bug. I just didn't bother fixing it yet)
IMG:https://stuff.unrealsoftware.de/pics/s3dev/mapgen/rivergen1_pre.jpg

> click to enlarge


Here's a 3D world shot of a riverbed generated by this algorithm. For this shot I just reduced the terrain heights for the riverbed by 1 m. This doesn't work well because I only reduced one single heightmap point per river square meter. This works for straight rivers but leads to very bad results when you have diagonal rivers:
IMG:https://stuff.unrealsoftware.de/pics/s3dev/mapgen/rivergen2_pre.jpg

> click to enlarge


So after this first quick approach I faced several problems:
× 1. Rivers look artificial because they are not curvy enough
× 2. Rivers stop in most cases and never reach the sea because chances that they just hit a hill are very high.
× 3. Changing only one single heightmap altitude per river "tile" is not sufficient to form a good looking riverbed. Also it doesn't allow different river sizes.

Strategy to solve problem #1: Rivers need a real direction. The algorithm to search the next river tile needs to be refined and it needs to take the current river direction into account instead of only checking the altitudes. Having a direction also means that I have more influence on the river course. The direction can be altered slightly with each step with a simple sine operation (of course cosine would work too! duh!). This should result in a more curvy riverbed.

I already started to implement this and it looks way more natural. Of course it needs some tweaking but the principle works very well:
IMG:https://stuff.unrealsoftware.de/pics/s3dev/mapgen/rivergen3_pre.jpg

> click to enlarge


The altitude checks are disabled completely for the above shot and I limited the river length. I'm also doing 2 pixel steps which explains the gaps. My plan is to combine the altitude checks and the direction. The more a direction is off the calculated direction, the more altitude penalty will be added. This way the river will tend to choose the calculated direction but good altitudes in other directions can influence it.

Is this the only stuff you did since the last dev blog entry?
No, I did a lot of refactoring. I should stop that. Seriously. It's like premature optimization. It's death. It's stagnation. Don't do it in hobby projects unless your code is REALLY bad (and I mean goto-spaghetti-bad not just stupid-function-names-bad).
I also did some other things. For example: A class which allows me to render tiny numbers into textures (for debugging purposes) or converting a Java polygon filling algorithm to C#. By the way: The polygon filling is still by far the slowest step of my random map generation. It takes ~0.28 seconds for the sample map which has a size of 512² pixels. It took ~0.33 seconds before I made the polygon filler static instead of instantiating a new one for each polygon. I even considered to use the GPU to render the filled polygons but that would be somewhat dirty and it wouldn't work on headless servers later.

Concerns regarding development speed
I'm not fast enough. I won't finish this game within the next 10 years unless I invest more time. I want to push myself to work more on the game. Therefore I'll try to make at least one dev blog entry - with actual content - each week. From now on. Let's see if I can manage to do that!
edited 4×, last 19.06.16 12:04:21 pm

old More About Rivers & Plant Models

DC
Admin Off Offline

Quote
More About Rivers
I'm a pretty huge fan of the KISS principle but the rather simple approach to just choose random points to spawn rivers and to modify them a bit with sine has a few drawbacks. The worst ones I came across so far:
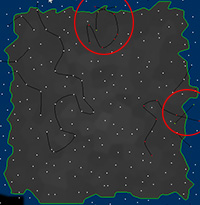
• Rivers may collide with each other
• Rivers may collide with themselves

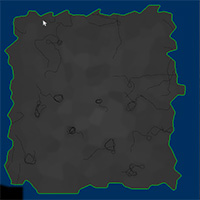
IMG:https://stuff.unrealsoftware.de/pics/s3dev/mapgen/shoredetection_pre.jpg

> click to enlarge


The crazy stuff going on with the rivers in the above picture is not cool!

I need to improve my approach. One thought was to detect the shore and then let rivers flow from random points in the map to random shore points.

Shore Detection
Detecting the shore is actually super easy: Check all heights in the terrain array. If a height is below sea level, check the 4 direct neighbors of it (top, left, bottom, right) and see if at least one is above sea level. If this is the case it's a shore. Otherwise it's not. The green shore line in the picture is detected this way.

A* Pathfinding
I tried determining the perfect river path from the random land point to the random shore point with A*. I'm not happy with the results and also my A* is super slow because I'm using a pretty poor priority queue implementation. Overall A* seems to be a bit overkill. It would probably take most of the terrain generation time even with a highly optimized priority queue.

Using The Voronoi Data
I already used Delaunay triangulation to generate Voronoi polygons for the heightmap itself. It would be clever to generate the rivers based on the same data. That's actually what the Red Blob Games guy does. My map creation algorithm is based on that article. So this is what I'll try next to finally get some plausible random rivers.

More Models
Also here are two new basic models with hand painted textures.

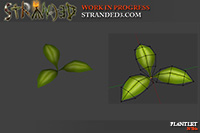
A random plantlet. No real world species.
IMG:https://stuff.unrealsoftware.de/pics/s3dev/models/plantlet1_pre.jpg

> click to enlarge


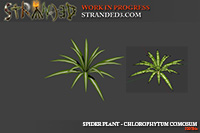
A spider plant! I actually have one of these in my apartment and used it as reference for the leaf texture.
IMG:https://stuff.unrealsoftware.de/pics/s3dev/models/spiderplant_pre.jpg

> click to enlarge
edited 1×, last 19.06.16 12:05:06 pm

old Voronoi Powered Rivers, Bezier & Shell Model

DC
Admin Off Offline

Quote
Voronoi Powered Rivers
I'm now using the terrain Voronoi data also for the rivers.
This is what it looks like when random Voronoi edges are used for the river generation:
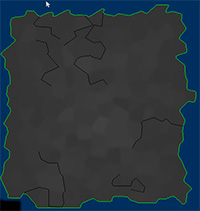
IMG:https://stuff.unrealsoftware.de/pics/s3dev/mapgen/rivergen4_pre.jpg

> click to enlarge


Note that I also incorporated a blacklist to prevent the algorithm from using the same edges multiple times. This solves the issues from my previous blog entry (rivers colliding with themselves and other rivers).
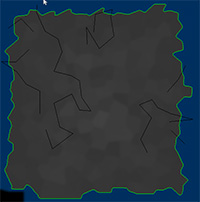
Still room for improvement though. So what I did next is working with the terrain heights again. The following picture shows the adjusted algorithm which prefers edges with lower heights as successors:
IMG:https://stuff.unrealsoftware.de/pics/s3dev/mapgen/rivergen5_pre.jpg

> click to enlarge


Not the worst result I saw so far but there's still a lot of stuff to take care of.
I'm generating pretty flat terrain areas with different heights. The current river approach would spawn the rivers alongside the cliffs and slopes between these areas. To avoid this I altered the algorithm to use the random Voronoi center points instead of the edges.
IMG:https://stuff.unrealsoftware.de/pics/s3dev/mapgen/rivergen6_pre.jpg

> click to enlarge


A problem still present in this picture: The river ends are not blacklisted. They seem to continue in the sea but actually it's just other rivers coincidentally using the same center point.
Also they are obviously super cornered. That's not what rivers look like. Bézier to the rescue!
I use the code from Bézier Curves for your Games: A Tutorial for the Bézier path calculation. It's for 3D points but reducing it to 2D is trivial.

IMG:https://stuff.unrealsoftware.de/pics/s3dev/mapgen/rivergen7_pre.jpg

> click to enlarge


Much better! Next problem: Rivers can still collide with each other in some specific cases. This is due to the grid nature of the center points. It allows diagonal "x"-collisions of lines when adjacent (not blacklisted) pairs of points are connected with lines.

IMG:https://stuff.unrealsoftware.de/pics/s3dev/mapgen/rivergen8_pre.jpg

> click to enlarge


It's relatively easy to solve this problem: When scanning diagonal neighbors as potential river successor nodes, make sure that their diagonal neighbors aren't blacklisted either.
An additional improvement would be to blacklist the areas around a river after generating it so other rivers are not spawned too close to it.

I also started writing some code to dig the riverbed into the terrain. I'm basically lowering the terrain around the river line, using a simple distance check to define how much the height should be changed. This allows me to easily create rivers of any size.
The following screenshot is a bit cheated because the water in this river is actually from my sea water plane:
IMG:https://stuff.unrealsoftware.de/pics/s3dev/mapgen/rivergen9_pre.jpg

> click to enlarge


Later I'll have to create triangle strips to create the water surface for the river water.

What about lakes and waterfalls?
I read many comments regarding lakes and waterfalls. Both of these things are planned. In fact I already posted something about lakes in a very old dev blog entry. This was just about a map editor tool which filled pits with water by creating a water surface mesh but the same stuff can be used for the random map generation as well. There we just need another step which searches or forms a pit for the lake.

The plan for waterfalls is that they will be spawned as soon as the height difference in a river is large enough. For instance when a river is flowing down a cliff. I could even do automatic rapids for micro bumps in the riverbed. I didn't work on this yet.

Shell
Finally here's a quite stupid and random time lapse video where I try to create a shell model with Blender. With webcam picture in picture showing my hands. It's amazing!
> Click to watch on YouTube!
edited 1×, last 19.06.16 12:05:45 pm

old River Surface Mesh, Lua API Changes & Shell Skin

DC
Admin Off Offline

Quote
River Water Surface
Generating a simple water surface mesh for the river is not a big deal. This is the result of my first attempt (which is a ~70 line C# class):
IMG:https://stuff.unrealsoftware.de/pics/s3dev/mapgen/rivergen10_pre.jpg

> click to enlarge


This mesh is only based on the river points which are calculated by the random terrain generator. A more sophisticated approach would be to actually check the terrain heights to make sure that the river has neither gaps inside the river bed nor overflows outside the river bed.
Moreover it probably makes a lot of sense to split the river into multiple meshes for long rivers so the engine doesn't have to deal with the entire river all the time even though only small parts are visible.

Lua API
Stranded III will make heavy use of Lua scripts (as already mentioned in previous blog entries). This also includes the entire user interface which is 100% scripted in Lua.

I worked on the Lua API to make it more object oriented. It previously worked like:
1
2
3
4
sprite = s3sprite.create(image, x, y)
s3sprite.setColor(sprite, {255, 0, 0})
s3sprite.setRotation(sprite, math.random(360))
s3sprite.setSize(sprite, 3, 3)

Now you can do the same thing with a bit less code:
1
2
3
4
sprite = s3sprite.create(image, x, y)
sprite.setColor({255, 0, 0})
sprite.setRotation(math.random(360))
sprite.setSize(3, 3)

Don't confuse s3sprite (Stranded III sprite module/library) and sprite (variable containing an actual sprite instance) here!
The difference is that you now call methods directly on the instance instead of passing it in as first parameter. This may not seem like a huge change but it makes scripts cleaner, shorter and easier to read.

Unfortunately I already wrote a few Lua scripts for Stranded III so I had to change over 600 function calls for this API change...

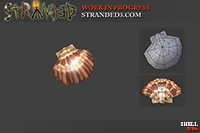
Shell
In the last dev blog I showed a little video where I modeled a shell. I continued working on the shell and recorded a video of me drawing the skin. People who subscribed to Unreal Software's YouTube channel probably already saw it because I uploaded it some days ago:
> Click to watch on YouTube!

This is the model with texture:
IMG:https://stuff.unrealsoftware.de/pics/s3dev/models/shell_pre.jpg

> click to enlarge


The shell model would actually be a good candidate for a bump map. I drew the shading on separate layers in Photoshop so I could easily create a bump map from it. It would probably only need some small adjustments. I didn't give that a try yet though.
edited 2×, last 19.06.16 12:06:20 pm

old Not Much Progress & Ugly Flower

DC
Admin Off Offline

Quote
Lua UI System
I didn't have much time to work on Stranded III this week. Actually that's not entirely true. I had a lot of time this weekend but I didn't really manage to use it. Let me explain why.

What I wanted to tackle is some stuff in my Lua script for the game UI. I have so called "areas" there which are basically something like windows or panels. You can place UI components like buttons, labels etc. on them. This process is made easier by an "insertion system" which automatically positions and scales the components you create in their parent area. It's a very simple system which makes use of rows and columns but it's sufficient for basic menu layouts. This way you don't have to deal with positions and sizes for UI elements at all. Unless you want to have super fancy and crazy UI layouts.

Most of this is already working fine but there are still some nasty problems. The thing is that (at least to me) it is annoying work. Trying out things and working with a lot of numbers, positions and figuring out the best way to make a generic and clean system. I'm also so used to the comfort of awesome IDEs now that working with Lua in Notepad++ feels ridiculously crude and inconvenient. Maybe this is actually the biggest problem.

TL;DR: I don't have much progress code-wise because I wasn't able to motivate myself enough to solve the problems in the UI system. But: I have a guilty conscience now and maybe this helps to motivate me a bit more...

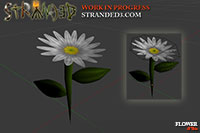
A Flower
This is a video of me drawing a flower. I chose the lazy approach which means that I'm duplicating a lot of stuff and that I use some Photoshop effects. I'm not 100%happy with the result though I'll probably touch this texture again to improve it a bit.
> Click to watch on YouTube!

I also made a model and textured it with my flower texture (and a new little leaf texture that I also drew):
IMG:https://stuff.unrealsoftware.de/pics/s3dev/models/flower1_pre.jpg

> click to enlarge


That's it for this week! I hope I'll be able to show more stuff next week!
edited 1×, last 19.06.16 12:06:56 pm

old Lua Progress, Palm Tree & Better Flower

DC
Admin Off Offline

Quote
Lua Progress
I worked on the Lua stuff that I didn't get done previous week. The following stuff actually worked before already but I want to show it to you nevertheless so you get an idea what the Lua code looks like.

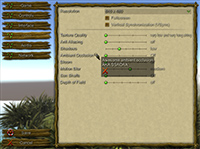
So this is what the graphic settings menu looks like:
IMG:https://stuff.unrealsoftware.de/pics/s3dev/ui/videosettings_pre.jpg

> click to enlarge


And this is the Lua code to build it:
1
2
3
4
5
6
7
8
9
10
11
12
13
14
15
16
17
18
19
20
21
22
23
24
25
26
27
28
29
30
31
32
33
34
35
36
37
38
39
40
41
42
43
44
45
46
47
48
49
50
51
52
53
menu.menu[menu.enum.settingsVideo] = {
     areasToKeep = {menu.area.settings},
     
     start = function(self)
          menuSettingsButtons()
          
          gui.area:createMain()

          gui.label.add("Resolution")
          local resTable = s3screen.getResolutions()
          local resList = {}
          for i = 1, #resTable do
               resList[i] = resTable[i].width .. " x " .. resTable[i].height
               --print(resList[i])
          end
          gui.combobox.add(resList)

          gui.insert:nextCol()
          gui.checkbox.add("Fullscreen")
          
          gui.insert:nextCol()
          gui.checkbox.add("Vertical Synchronization (VSync)")
          
          gui.insert:yPad(true)
          
          gui.label.add("Texture Quality")
          gui.slider.add({"very low and very long string", "low", "medium", "good"})
          
          gui.label.add("Anti Aliasing")
          gui.slider.add({"off", "2x", "4x", "8x"})

          gui.label.add("Shadows")
          gui.slider.add({"off", "very low", "low", "medium", "good", "very good", "ultra"})
          
          gui.label.add("Ambient Occlusion", {"Awesome ambient occlusion", "AKA SSAOAA", menu.gfx.icon_cancel})
          gui.slider.add({"Off", "Low Quality", "Medium Quality", "High Quality"})

          gui.label.add("Bloom")
          gui.slider.add({"off", "very weak", "weak", "medium", "strong", "very strong"})
          
          gui.label.add("Motion Blur")
          gui.slider.add({"off", "very weak", "weak", "medium", "strong", "very strong"})
          
          gui.label.add("Sun Shafts")
          gui.slider.add({"Off", "Low Quality", "Medium Quality", "High Quality"})
          
          gui.label.add("Depth of Field")
          gui.slider.add({"off", "very weak", "weak", "medium", "strong", "very strong"})     
     end,

     update = function(self)
     end
}
Line 2 defines the "areas to keep" - these are actually areas with components which will not get destroyed when switching the menu. In this case it's the menu bar on the left. It's created by the function call in line 5 (if it doesn't exist yet). Don't be scared: This is probably the dirtiest part of this snippet

The "main area" is created in line 7. It's the big square in which all the components are placed.

Lines 10 to 15 get a table of available resolutions and convert it to a readable format for a combo box.

Most of the other lines are about creating UI components which are automatically placed at the right positions.

Note the empty update function (ll. 51-52). This menu is currently fully static (no crazy animations or actions) so it doesn't need to do anything in the update function. The place where this function is called also checks if update is nil so I could also just remove the empty function as well.
Of course there are interactive components like buttons and sliders but these are updated automatically by the UI system so you don't have to take care of this yourself in each menu.

Also all the strings will later come from the localization system instead of being specified directly as English strings.

The insertion system which is used to place the UI components in the window defaults to a 2 column layout with a size ratio of 1 (for the first column) to 2 (for the second column).
1
gui.insert.columns = {1, 2}
Any other configuration can be chosen easily by simply changing this value before calling the add-functions.

e.g.:
Adding this to line 8...
1
gui.insert.columns = {1, 2, 1, 2}

...will transform the 2 column layout to a 4 column layout (the values are still for the size ratios as explained before). I have to admit that I increased the window size a bit for the following shot because everything was badly clinched and it still is but I hope you get the idea:
IMG: http://stuff.unrealsoftware.de/pics/s3dev/ui/videosettings2_pre.jpg
> click to enlarge

Note the fancy multi line + image tool-tip at the mouse pointer. It's defined in a super convenient way in line 35: A simple table of strings and/or images! The little tool-tip exclamation mark icon however is not well positioned in the second shot. This is due to the down-scaled label text. I need to fix that.

Oh and of course all this is not finished. Some of the settings will most likely change or get removed and some others will certainly be added.

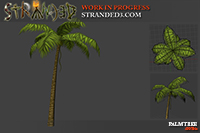
Palm Tree
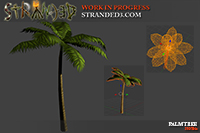
Stranded III will obviously have a tropical setting so it needs a lot of palm trees. That's why I created a new one!
> Click to watch me drawing the palm frond texture on YouTube!

This is the model (also with a new palm bark texture):
IMG:https://stuff.unrealsoftware.de/pics/s3dev/models/palmtree_pre.jpg

> click to enlarge

This palm tree is - as (nearly) always - work in progress and (probably) not final stuff.

By the way: I used the Hand-Painted Island Pack from the Unity asset store as reference (I didn't buy it, I just used the pictures from the asset store). I really love that style.

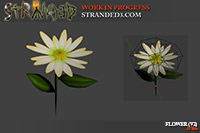
Flower Version 2
I really disliked the flower I presented in my previous dev blog so I worked a bit on it to improve it. The biggest problem was certainly that I used gray for shading which is almost always a horrible idea because it makes stuff look dirty. It's something you should avoid - especially when you're creating a flower! I just didn't think about it when I made it...

Whatever. Here's an improved version which looks much better in my opinion. I also tweaked the model a bit and made it a bit more detailed.
IMG:https://stuff.unrealsoftware.de/pics/s3dev/models/flower1v2_pre.jpg

> click to enlarge
edited 4×, last 19.06.16 12:07:22 pm

old Tab UI Component

DC
Admin Off Offline

Quote
Tab UI Component
This week I scripted a tab bar. It allows you to switch between tabs and it supports text labels, icons, tooltips and callback functions which are called when a tab is selected.
The following screenshot shows a tab bar which is using text labels:
IMG:https://stuff.unrealsoftware.de/pics/s3dev/ui/tab_component.jpg

I will probably adjust the tab sprites a bit in future but I think it's already pretty obvious what this thing does and how it works.

This is the code to create it:
1
2
3
4
5
gui.tabs.add({"Skill A", "Skill B", "Skill C", "skill D"}, callback)

function callback(tabindex)
	-- do something when the tab is switched
end
Actually only line 1 is required to create the tab bar. The rest is just a callback function which will be called by the tab component when the user clicks a tab. It can be used to run scripts which change the window content according to the selected tab. The index of the selected tab will be passed to the callback function as parameter (called tabindex in this example).

Instead of having a table with just strings you could also use a table of tables to define more stuff. E.g.:
1
2
3
4
5
gui.tabs.add({
	{icon = icon1, tooltip = "this is a tab bar with icons"},
	{icon = icon2, tooltip = "it also has tooltips"},
	{icon = icon3, tooltip = "awesome"},
}, callback)

Other components like the combobox work the same way.

How about new fancy models?
I want to write something about code / game logic and show new models/textures/sprites in each dev blog but... It was a busy week and I don't have new stuff to show this time! No worries though! I'll try to create some more models for the next blog entry to compensate!
edited 1×, last 19.06.16 12:07:36 pm

old Vine Stuff, Aloe Vera & Blue Tang

DC
Admin Off Offline

Quote
Vine Stuff
Some trees in Stranded III will haves vines so I prepared some textures for that:
IMG:https://stuff.unrealsoftware.de/pics/s3dev/models/vinestuff_pre.jpg

> click to enlarge


I used these new textures to make a palm tree variation with two small vines. It's not just a copy of the existing palm tree. I rearranged all palm fronds and modified the trunk as well to make it look more different:
IMG:https://stuff.unrealsoftware.de/pics/s3dev/models/palmtree_b_pre.jpg

> click to enlarge


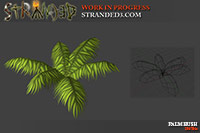
The palm frond texture can also be recycled for new bushes:
IMG:https://stuff.unrealsoftware.de/pics/s3dev/models/palmbush_pre.jpg

> click to enlarge


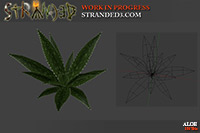
Aaand another new plant: Aloe vera! You'll probably be able to speedup wound healing with it and it will help to decrease the risk of infections when you have open wounds and use it.
IMG:https://stuff.unrealsoftware.de/pics/s3dev/models/aloe_pre.jpg

> click to enlarge


Fish
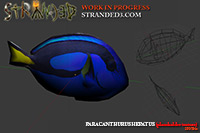
Moreover I created a fish model after seeing a lot of those during my visit of the Tropen-Aquarium Hagenbeck in Hamburg today:
IMG:https://stuff.unrealsoftware.de/pics/s3dev/models/paracanthurus_hepatus_pre.jpg

> click to enlarge

Right, it's a blue tang (aka regal tang, palette surgeonfish or paracanthurus hepatus). The most famous instance of this species is probably Dory from the Disney Pixar movie Finding Nemo.
I just created the model so far. The texture is currently a photo from the internet but it will be replaced with a hand-drawn texture later.
edited 1×, last 19.06.16 12:08:16 pm
To the start Previous 1 2 3 4 5 6 Next To the start
Log in to replyProjects overviewForums overview